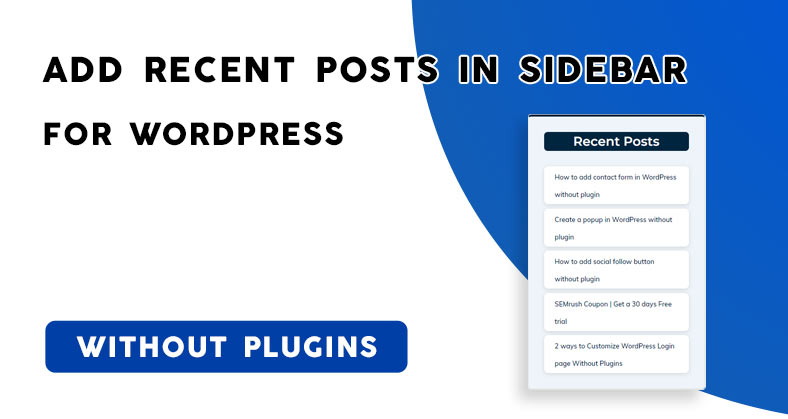
As a content writer, your motive should be to provide as much valuable content to your visitors as possible. Let’s see How to style Recent posts in WordPress sidebar without plugin. The best way to do so is by showing your recently composed articles that might be relevant to a reader.
If a visitor is finding your current article helpful or enjoyable, there is a high chance that a related article might grab their attention and land them on the recent posts.
This article shows how to add ‘Recent Posts’ to your sidebar and style it uniquely to stand out among other visible elements on the page.
Related: How to add author image in WordPress posts
Adding Sidebar Widget
Before starting the styling part, the sidebar needs to be integrated from the WordPress Widget section.
There are multiple methods to add a recent posts in the sidebar, though we would follow the simplest procedure by adding a widget at Right Sidebar.
Open up the WordPress Dashboard the head over to Appearance > Widgets
Scroll until you find 'Recent Posts' and drag it over to 'Right Sidebar', tweak how many posts you’re willing to showcase as well as the Heading.

To showcase any specific blog post or link, Custom HTML has to be used which we’ll be discussing in another post if we receive requests on that in the comment section.
Related: How to add verified badge to WordPress users
Styling Widget
Now that our ‘Recent posts’ category is added to sidebar, let’s style it using CSS.
You may use any external plugin to keep track of custom CSS, or use default WordPress custom CSS panel.
Navigate to Dashboard > Appearance > Customize > Additional CSS
Open the Additional CSS option and scroll to bottom and append the provided code snippet.
/* sidebar boxes customization */
#recent-posts-7 h2 {
	background-color:#00253e;
	color:white;
	text-align:center;
	border-radius:7px;
}
#recent-posts-7 {
	background-color:#eef4fa;
	border-top:4px solid #00253e;
	box-shadow: rgba(99, 99, 99, 0.2) 0px 2px 8px 0px;
}
#recent-posts-7 li{
	background-color:white;
	padding:3px 21px;
	border-radius:8px;
	box-shadow: rgba(99, 99, 99, 0.2) 0px 2px 8px 0px;
}
#recent-posts-7 li a{
	color:#00253e;
	font-size:13px;
}
Adding the code snippet doesn’t work right away until the CSS selectors are changed according to your website.
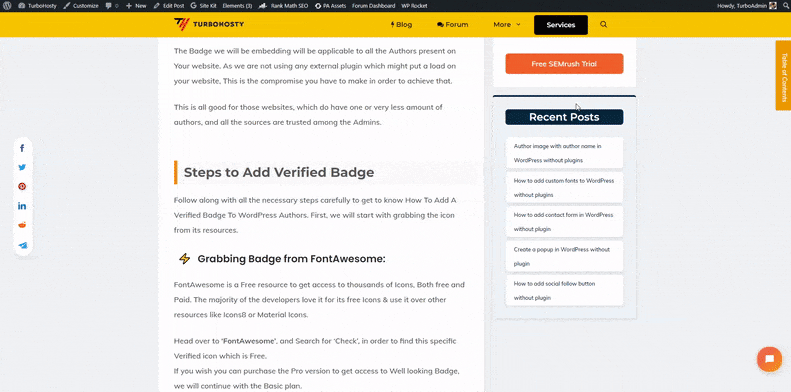
Open up any blog post and the Recent Posts section will be visible in the right sidebar. Right click on the top area of the box, click on 'Inspect'.
Copy the ‘id’ of the box, in my website it’s named recent-posts-7.
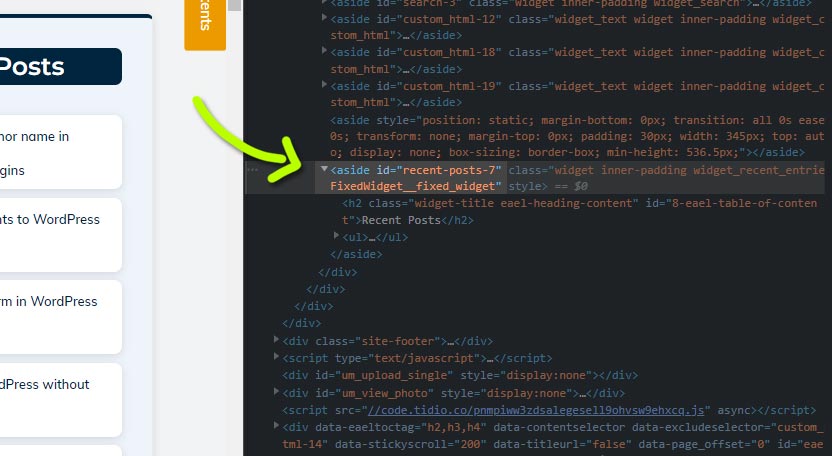
Change the ‘recent-posts-7’ with the ID of your element in the given code snippet and your recent posts section will look just fine.
Summing up
This was an in depth tutorial on ‘How to style Recent posts in WordPress sidebar without plugin’ which is part of our ‘No plugin‘ series where we add unique styling and functionalities without using any WordPress plugins.
Recent posts section not only shows users new posts and collects more user visits & decreases bounce ratio, it also works as a positive factor in SEO.
When you link one of your own pages to another internally within a page, the on page score is affected positively.